There are many hosts that offer 1-click installations of WordPress, but the 1-click install may cause problems that non-technical users may not even be aware of. I hope to detail the potential pitfalls with the typical 1-click WordPress install, and suggest that using the 1-click installation be avoided altogether, using WordPress’ built-in installation wizard instead. It offers easy web-based step by step installation, and ensures there are no issues with your site now or in the future.
Why the “1-Click WordPress Install” Should Be Avoided
An old version of WordPress is the only version available.
Most hosts that offer the “1-click” installation are using tools that offer a 1-click installation on a variety of platforms and packages, but these packages are rarely kept up to date. Installing this older version can cause issues when trying to update the latest version, and some hosts I’ve encountered actually block you from updating the version at all, locking you into a custom version that is not only outdated, but is tied to their update schedule, not your own.
It installs into a subfolder only, not to the root of your website.
It’s becoming less of an issue lately, but beware of the 1-click installs that force you to install WordPress into a subfolder, and not the root of your site. Years ago having a non-WordPress site at mydomain.com with a WordPress blog at mydomain.com/blog/ was common, but now that WordPress is more of a content management system (CMS), and less just a blog platform, most web sites are powered by WordPress and offer an integrated blog, if desired.
Limited permissions and almost no customizations.
Some web hosts offer simple installation wizards, in which they install WordPress, and keep it updated for you using automated tools, but they lock down the installation so that you have limited permissions, and that prohibits you from installing your own plugins or themes, basically defeating the main reasons that you’d not want to use the free wordpress.com service.
It creates a MySQL database with custom permissions.
Other web hosts offer easy installation, but once done, it creates custom database permissions, and you find out later that you have no access to editing, updating, or sometimes backing up the database files, which can be a big issue down the road, and resolving it usually means having to do a site migration to either a new installation, or a new web host.
The Famous WordPress 5 Minute Installation
How to easily install the latest version of WordPress yourself with their famous 5 minute installation…
Use your host’s Control Panel to create a MySQL database, and copy/paste the database name, username, password, and server name to a text file for use later. Be sure to give the database username DBA (database administrator) level permissions, which allows it to make any changes or edits anytime in the future.
Download the latest version of WordPress from http://wordpress.org/, and then upload it to your web host using their web-based File Manager (in the hosting control panel, good hosts offer a web-based File Manager).
Unzip the WordPress archive file using the File Manager (select the file, choose “Uncompress” or “Unzip”) and it will create a folder named WordPress. (A good host supports remote decompressing of files. Check with your host if you need help, and if your host doesn’t have a method for uncompressing ZIP files, consider switching hosts, as it’s very useful and saves tons of time transferring zipped files versus thousands of files individually.)
Rename or delete your default web site folder that your host created, but make note of the exact name. (Good hosts name it yourdomain.com matching your site, others name it www or public_html, and you may need to check with them to work out what folder you should be renaming/ deleting). Then, rename the new WordPress folder to be the same exact name of the web site folder.
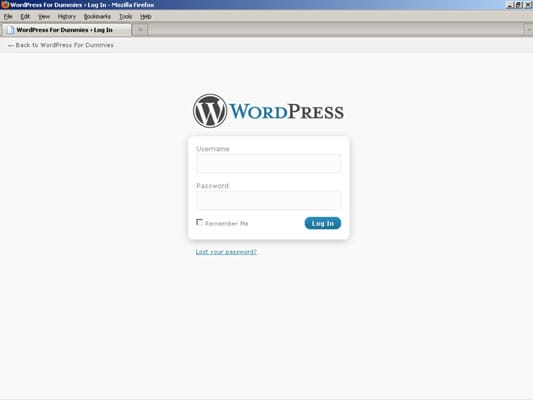
Visit your web site using the domain name (if it’s live) or the temp/alias URL if it’s not yet live (a good host will assign one automatically).
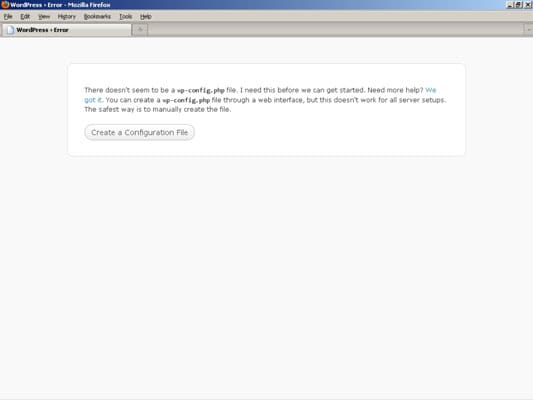
You should see the WordPress installation wizard, asking if it should create a config file… simply click the button.
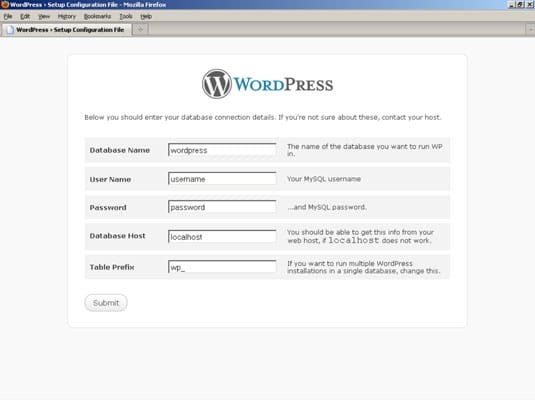
Enter in your database name, username, password, and server name that you made a note of earlier. Click the button, and your WordPress tables will be created in your database.
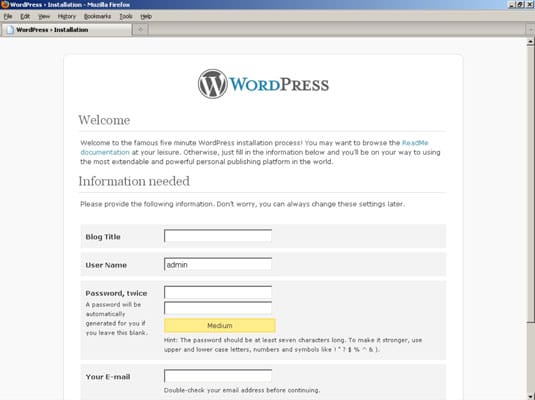
Give your site a name, choose a username (don’t use the default admin username for security purposes, choose your own), choose and make note of the password, and click the button.
Your installation is complete, go log in!
Now you can install the common plugins like WordPress SEO by Yoast, Google Analytics, AddThis Sharing buttons, MailChimp, BackWPUp, and others, as well as finding and uploading free or inexpensive themes, and start filling your new site with content by creating Pages and Blog Posts.
For more WordPress support check out these helpful articles from our WordPress Expert Series:
How to Optimize RSS to Display Featured Blog Images
WordPress for Enterprise Facts, Myths, and Tips for Success

No Comments